SheerPower 4GL is a next generation database language for Windows. It works on Windows 2000, Windows NT, Windows XP, Windows Vista, and Windows Server. It includes a Rapid Development Environment (SPDEV)  and a fourth-generation Database Language (SP4GL)
  .
.
The SheerPower language:
- is concise and powerful
- promotes structured programming
- is easy to use--even for programming novices
SheerPower excels at both character and mathematical utility, combining them into a powerful, easy-to-use framework. SheerPower can be used to write programs of any size, from simple-input applications to vast database infrastructures and Web applications. SheerPower's layout may look somewhat similar to that of a structured BASIC program, but SheerPower is beyond BASIC!
SheerPower includes a transparent interface to the ARS (Advanced Record System) database engine as well as to other database engines. (ARS is bundled into SheerPower).
ARS is integrated into SheerPower featuring extremely high speed sequential and random access to database information. In addition, ARS is optimized for client/server applications through the use of high performance memory resident shared data.
The interface includes:
- simple structure statements for complex data manipulations
- numerous extensions which allow the technical programmer to develop advanced applications
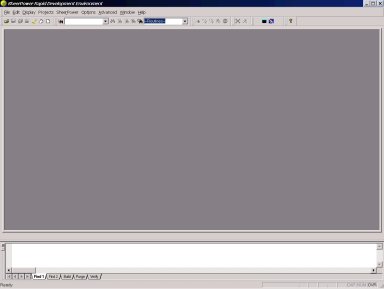
The SheerPower environment is designed for developing complex applications rapidly. This interactive environment:
- allows immediate response and fast development
- allows you to interrupt program execution, change code and then continue execution
- has high-level debugging facilities for pinpointing program bugs quickly and accurately
- returns errors immediately--for rapid development--while code is optimized by the compiler
Development cycle time is the time it takes to edit, compile, link, run and debug code. SheerPower reduces this time by providing an interactive and fast response environment. SheerPower offers features that cut cycle time significantly--up to 80%.
You will find SheerPower an exciting and powerful programming tool.
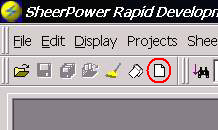
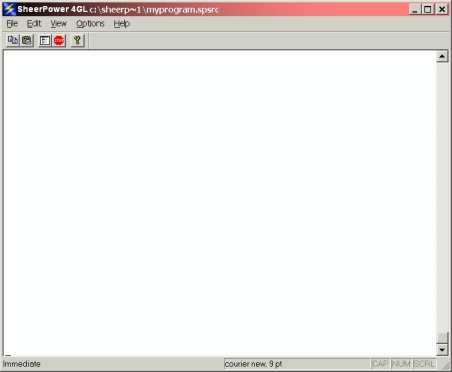
 To create a new program in SheerPower Rapid
Development Environment, click once on the New icon in
the toolbar---a white paper with one corner folded. This will create a
new file for you to work in.
To create a new program in SheerPower Rapid
Development Environment, click once on the New icon in
the toolbar---a white paper with one corner folded. This will create a
new file for you to work in.
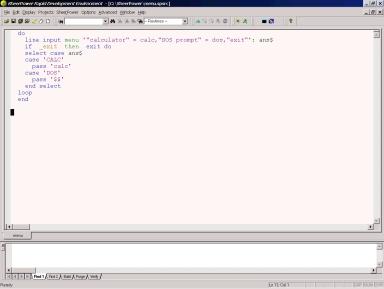
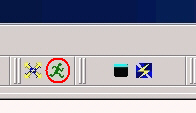
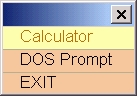
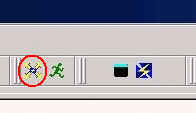
 RUN this program by clicking on the
Run icon in the SPDEV toolbar---the running man.
RUN this program by clicking on the
Run icon in the SPDEV toolbar---the running man.
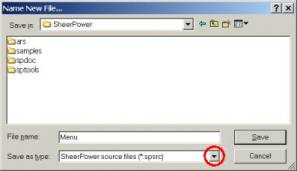
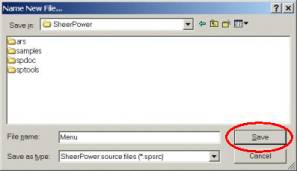
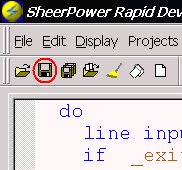
 To SAVE your program in SheerPower Rapid Development
Environment, click once on the Save icon in the SPDEV
toolbar---the floppy disk icon.
To SAVE your program in SheerPower Rapid Development
Environment, click once on the Save icon in the SPDEV
toolbar---the floppy disk icon.
 If you have multiple files open in SheerPower Rapid Development
Environment that you wish to save, click on the Save
All icon in the SPDEV toolbar---the icon with three floppy
discs together.
If you have multiple files open in SheerPower Rapid Development
Environment that you wish to save, click on the Save
All icon in the SPDEV toolbar---the icon with three floppy
discs together.
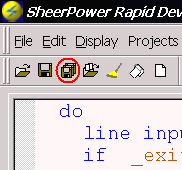
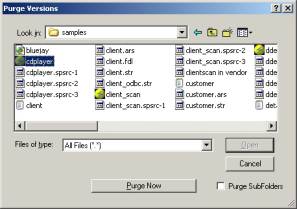
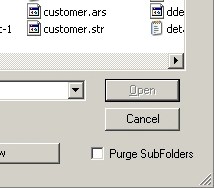
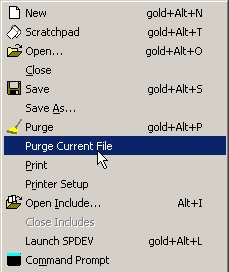
 To delete any unwanted SPDEV backup files, click on the
Purge icon in the SPDEV toolbar. The Purge
Versions dialog box will appear.
To delete any unwanted SPDEV backup files, click on the
Purge icon in the SPDEV toolbar. The Purge
Versions dialog box will appear.
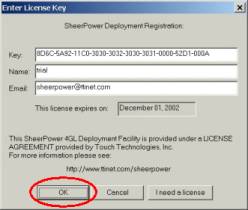
 In the SPDEV toolbar, click on the DEPLOY icon.

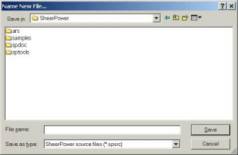
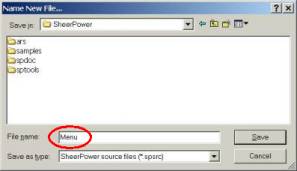
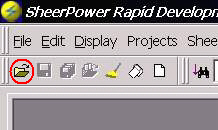
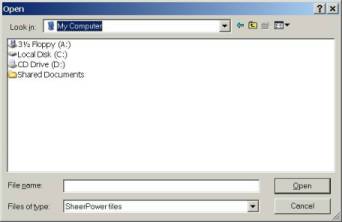
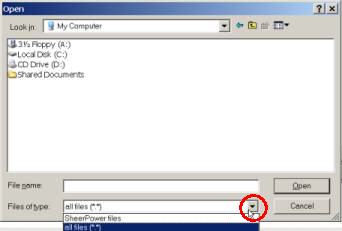
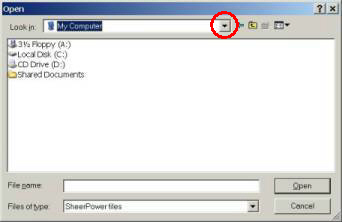
 If you need to open an existing file stored on your
computer to read or edit in SPDEV, click on the Open
icon in the toolbar---an open file folder. You can then choose the
directory and file you want to open from the OPEN
dialog box that appears.
If you need to open an existing file stored on your
computer to read or edit in SPDEV, click on the Open
icon in the toolbar---an open file folder. You can then choose the
directory and file you want to open from the OPEN
dialog box that appears.
 In SPDEV, you can get help by clicking on the Help
icon in the toolbar---a question mark.
In SPDEV, you can get help by clicking on the Help
icon in the toolbar---a question mark.
